Last week I found some time to try out my new lead molding equipment I got for Christmas from Sean. In the weeks prior I spent some time watching the majority of the
How-to Videos found on Do-It Molds website and also gathering all the extra tools and equipment that I needed. For someone who had no experience casting metals, the videos really helped me learn many tips and tricks of the trade. Also, before I attempted pouring molten lead I first tested the melting pot out with water.
Here's a list of the equipment I started with.
A Lee Pro 20 Series Melter.
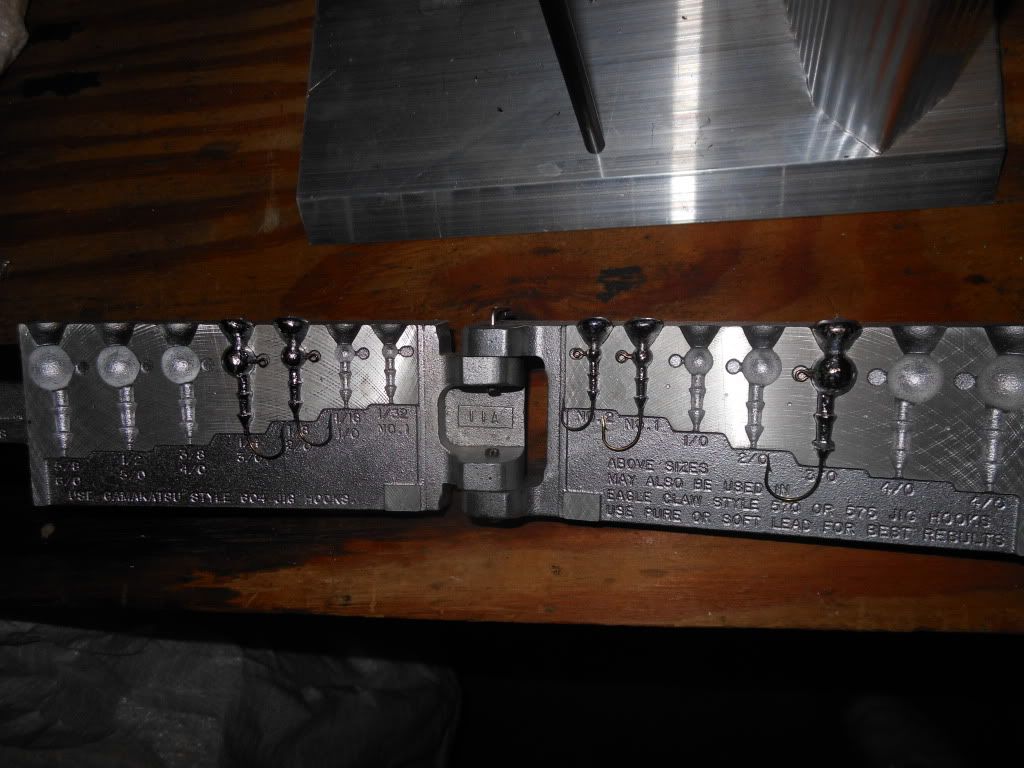
A Do-It Mold for 1/32 through 5/8 roundhead jigs.
4 packs of Eagle Claw 570 jig hooks in sizes 4, 2, 1, and 2/0.
4 containers of Pro-Tec jig paint in black, white, chartreuse, and blue.
A pair of gloves.
A pair of safety glasses.
A flathead screwdriver.
A pair of pliers.
A pop can cut in half (catch can).
A spoon.
A paperclip.
A heat gun.
A hanging rack.
A shop rag.
A pack of gulf wax (flux).
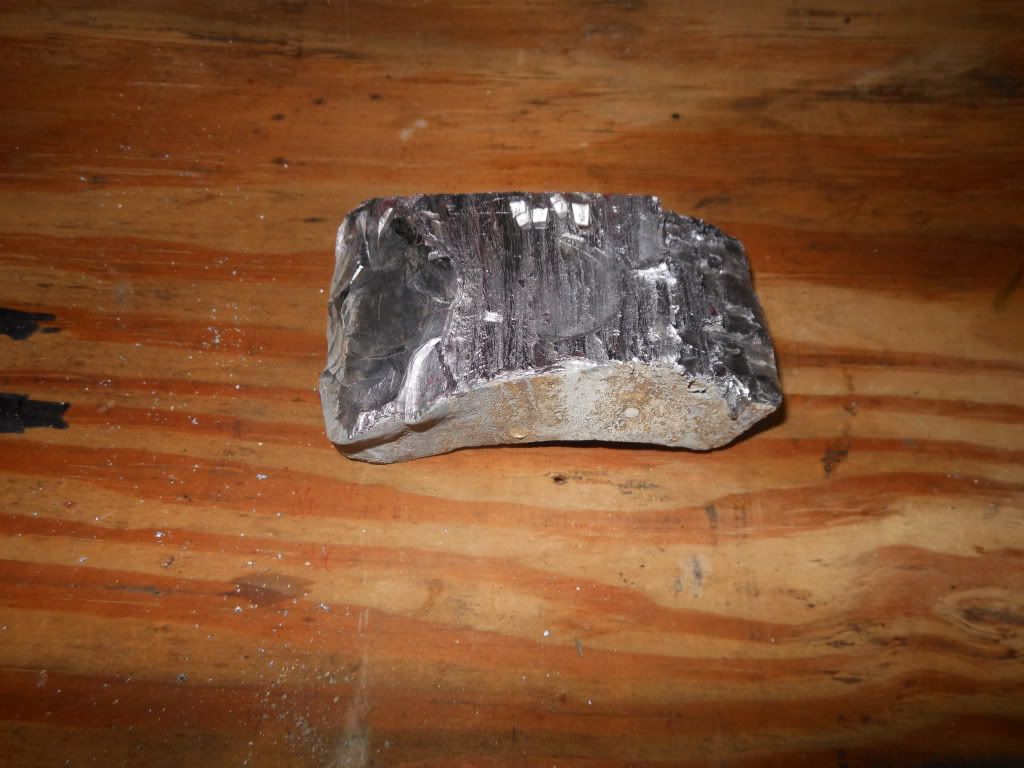
Last but not least, a 26lb lead brick.
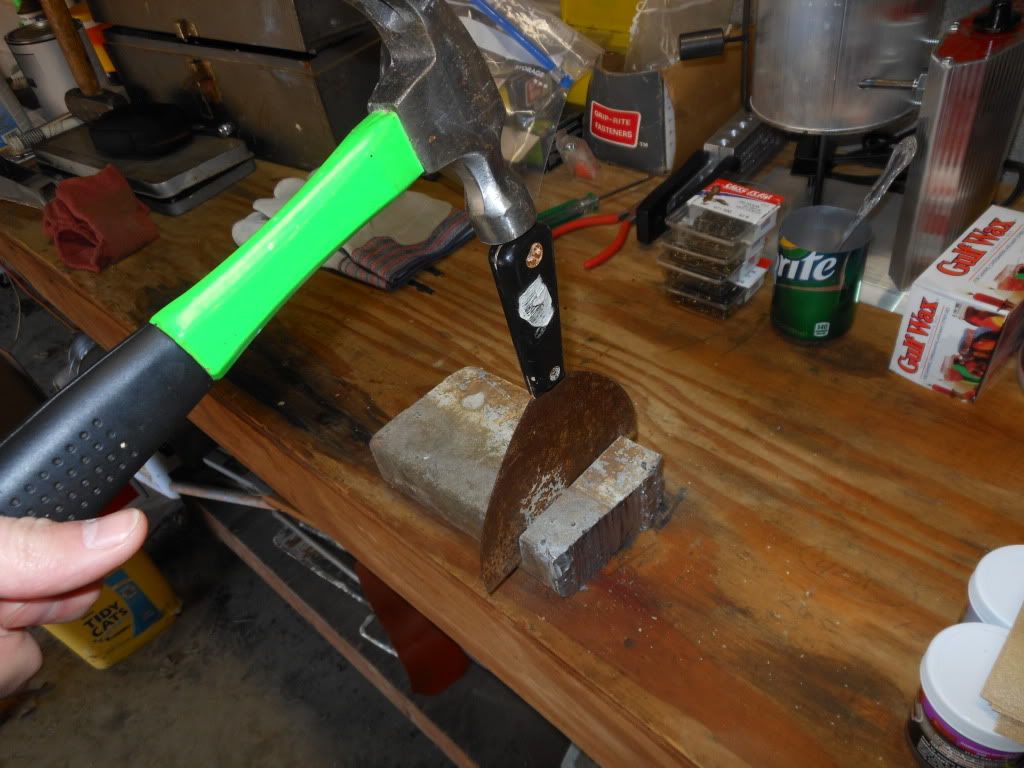
My first task was cutting the lead brick. I decided I would try using a hacksaw to cut the brick. I first laid out some newspapers to catch the lead shavings. After a good solid 5 minutes of sawing, I knew that cutting the brick with the hacksaw wasn't going to be as easy as I'd hoped.
 |
| Cutting the lead brick. |
I texted Sean and told him what I was up to. He had mentioned that he would come over when I made my first attempt at casting. He arrived soon thereafter and I'd like to say we made quick work of sawing the brick but that wasn't the case. After about an hour of vigorous sawing and pounding we finally had the brick cut.
 |
| Lead piece |
I did learn one thing, it was pretty easy to drive a screwdriver into the brick using a hammer since the lead was so soft. This gave me the idea of just pounding a larger blade of some sort through the brick on my second attempt, but more on that later.
As the directions stated, I placed a catch can, a cut in half pop can in my case, under the melting pots spout to catch any drips before I started melting the lead. I also had the flow control screw set for minimum flow to prevent any drips.
 |
| Catch can |
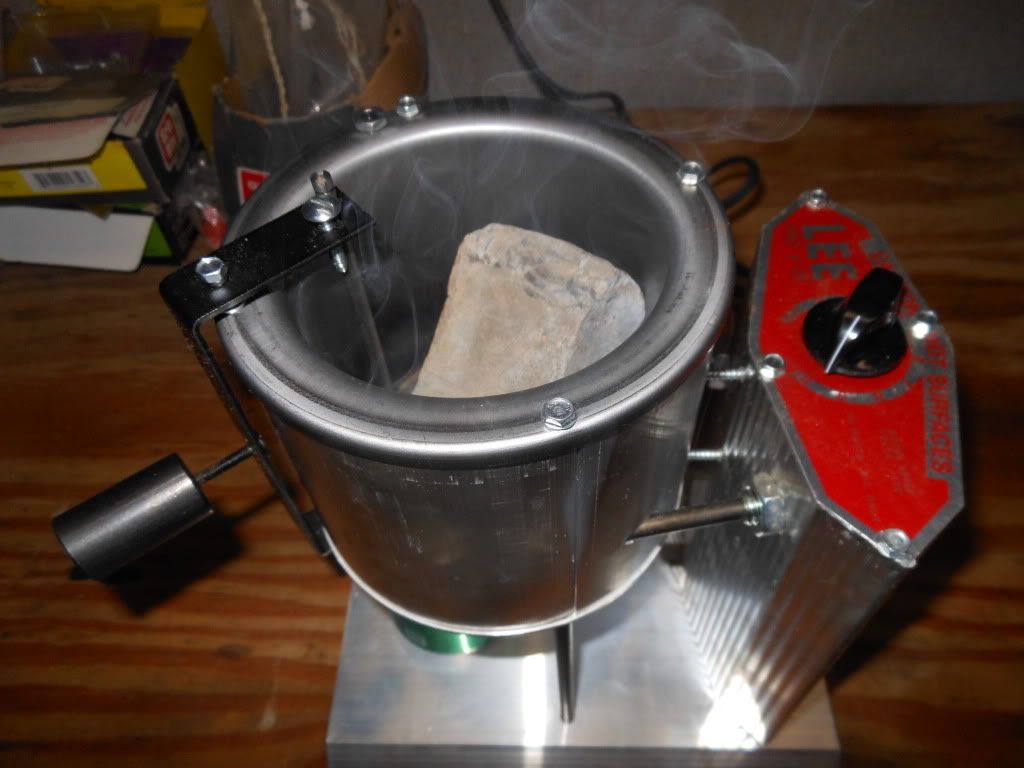
I then placed the piece of lead in the pot, plugged the pot in, and turned it up to max heat. It wasn't long before the pot started smoking.
 |
| Initial smoking when pot was first turned on |
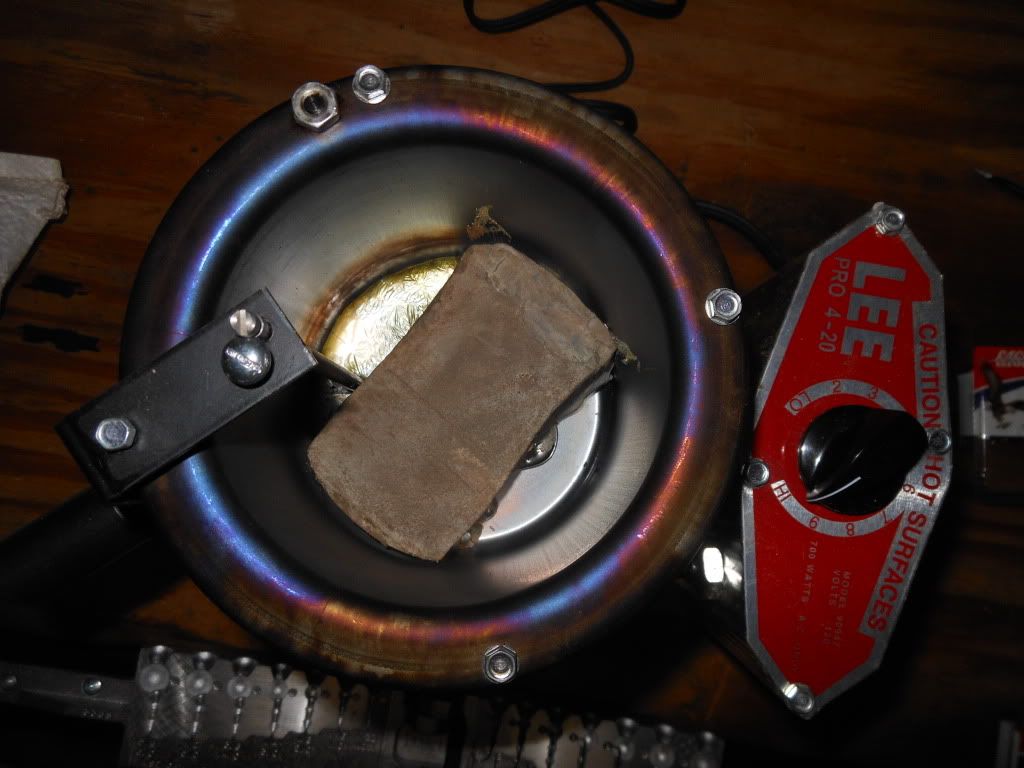
After about 15 minutes the piece of lead finally started to melt.
 |
| Lead starting to melt |
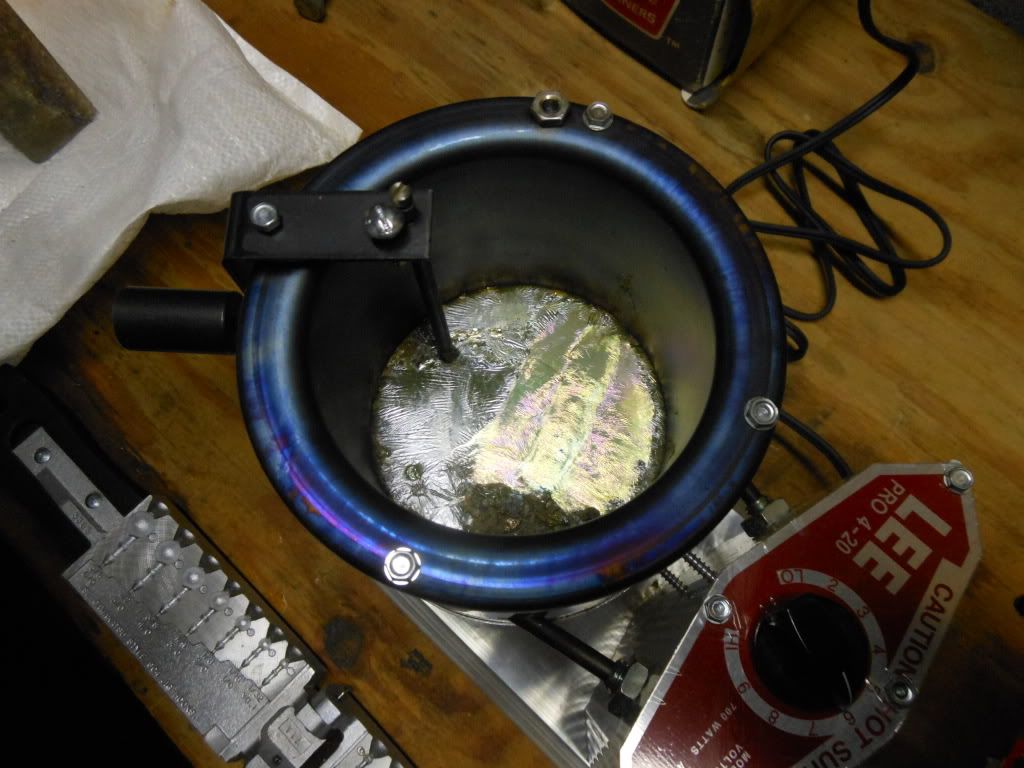
After the lead was fully melted I turned the the power knob on the Lee down to 6. From what I read/watched it was best to pour the lead at the lowest temperature possible. The melting point of lead is 621.5 degrees and the instructions said 650 degrees was a good starting point. Since the Lee's low temperature is 450 degrees and high temperature is 900 degrees, I predicted that the 5-6 power range would be 600-700 degrees.
 |
| Lead fully melted with impurities on top |
Next I put on my gloves and safety glasses and started scooping out the impurities that had floated to the surface. I removed the pop can and used it to dump the impurities in. After getting the bulk of the impurities I noticed that no matter how much I scooped, I layer of flaky golden material kept former on the surface so I just let it be.
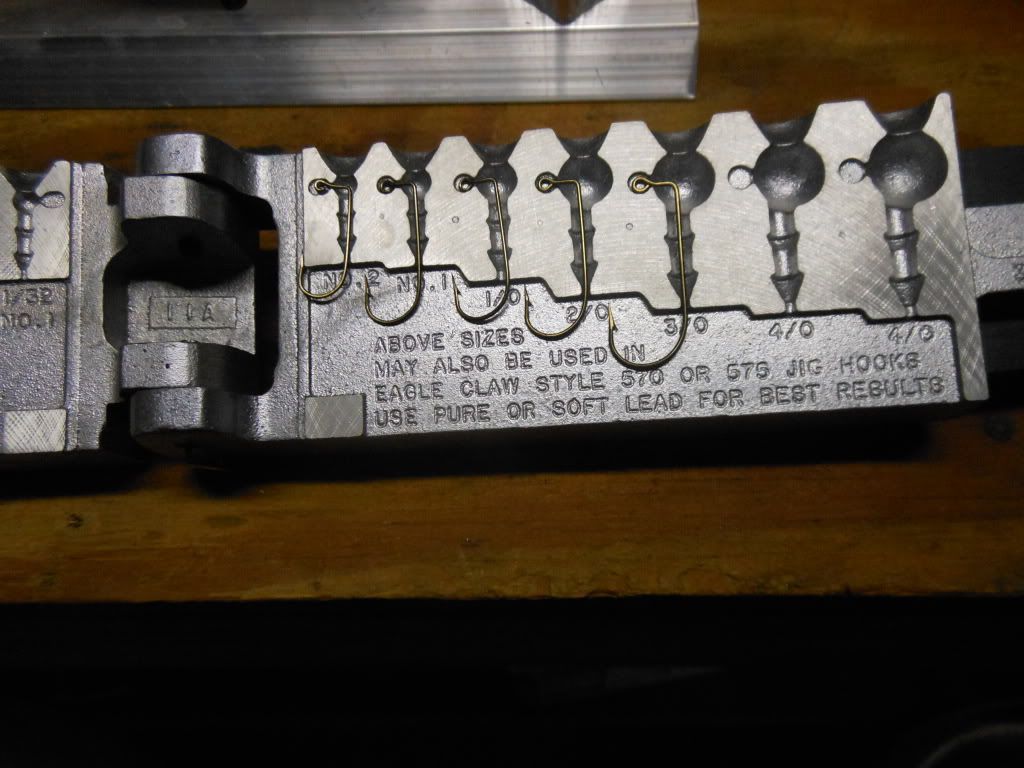
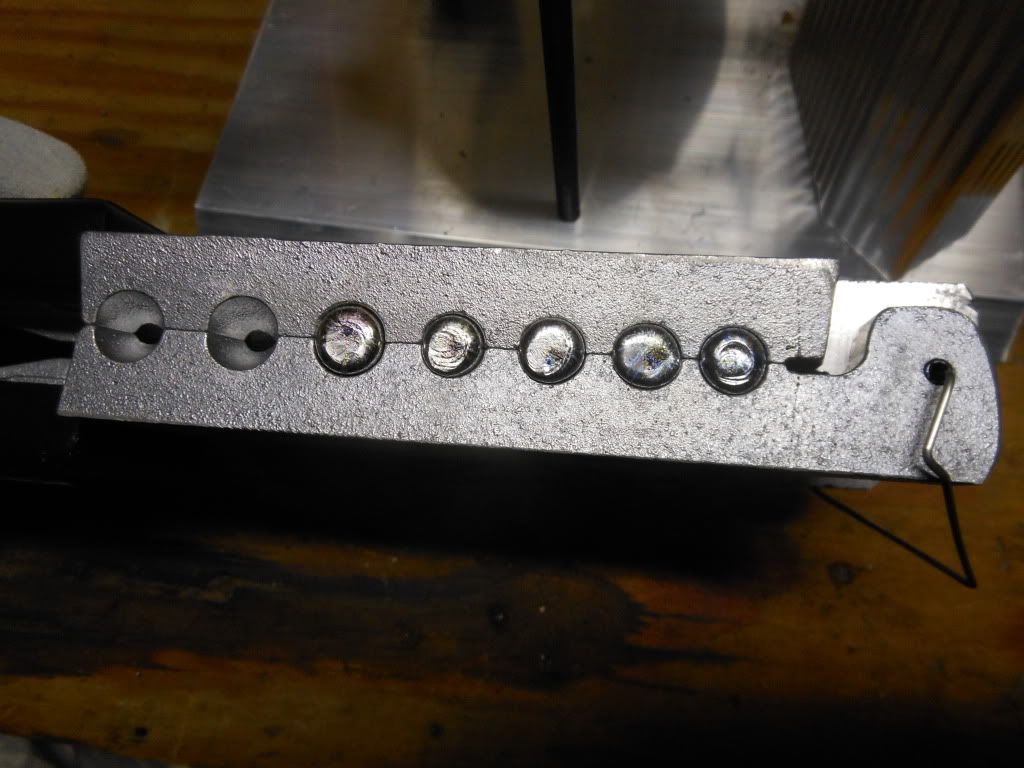
The next step was preparing the mold. First I placed hooks in the mold. You can place a variety of different hook sizes in each size jig mold. For this run I went with the smallest hook size that would fit in each mold without modification of the mold.
 |
| Hooks placed in mold |
In the picture above, the hook in the 1/8 size mold is out of place. After ensuring all hooks were fitted properly I closed the mold, making sure the mold closed flush. Next I placed the closed mold on top of the melting pot to heat it up. From the Do-It Mold videos I learned that I should heat the mold first for best results. I assume this is so the lead doesn't harden before all of the lead is poured.
 |
| Warming up the mold |
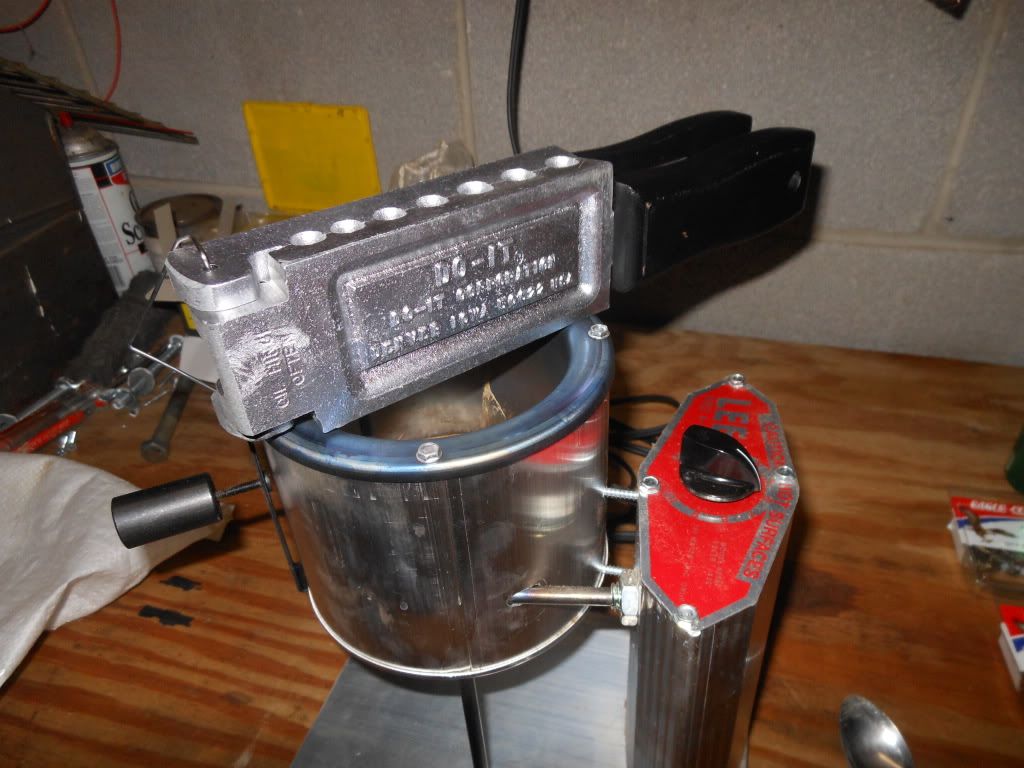
Next I adjusted the mold guide, which is a metal piece underneath the pot that the mold sits on, allowing you to guide it under the spout easily. With the mold warmed up and in place, I lifted the valve rod to see no flow, which was as expected. So I adjusted the flow control screw little by little waiting for flow to occur. Turning the flow control screw counter clockwise raises the screw, causing the valve rod to lift further allowing more flow.
 |
| Adjusting the flow control screw |
This is where we ran into our first problem. While adjusting the screw we actually caused it to slip completely from its groove in the valve rod causing instant continuous flow. We quickly held the valve rod down with pliers to stop the flow and popped the screw back into place. This is where I learned that if lead spills out onto the metal base, it hardens quick and doesn't stick so It can easily be picked up with pliers and placed back into the pot. In my opinion this also makes the catch can unnecessary. After finally getting the flow right I was ready to make some jigs. Here's a picture Sean took while I was pouring my first set.
 |
| Pouring my first set |
My first attempt turned out surprisingly well.
 |
| Sprues (excess) on top of the mold |
 |
| Jigs |
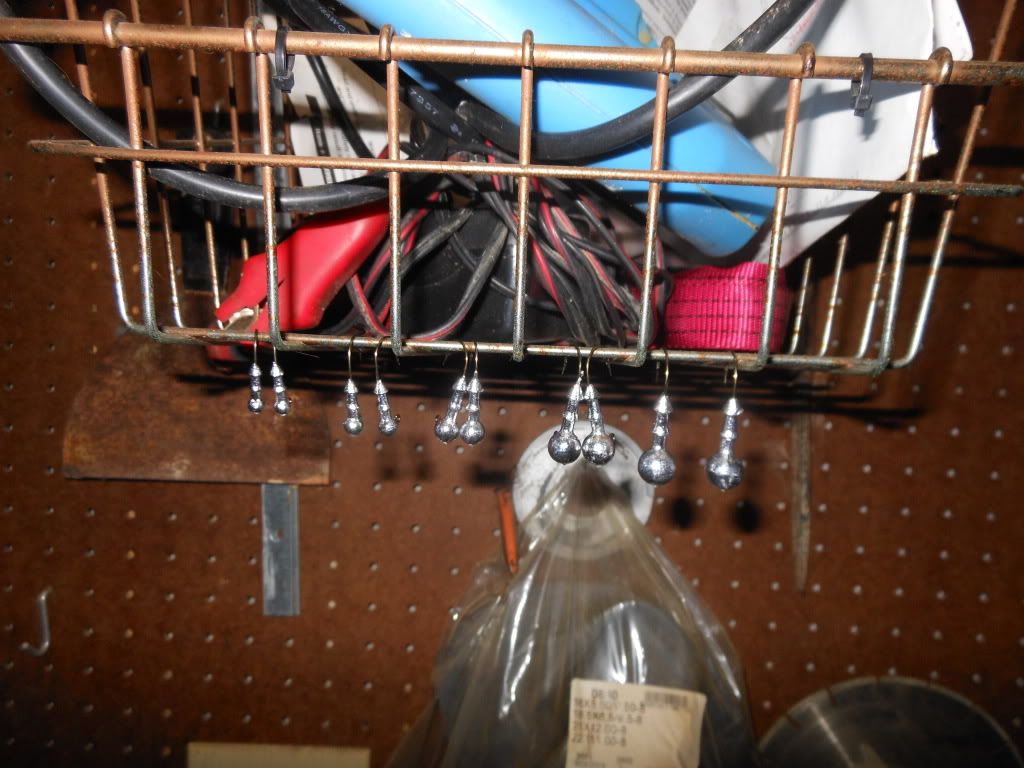
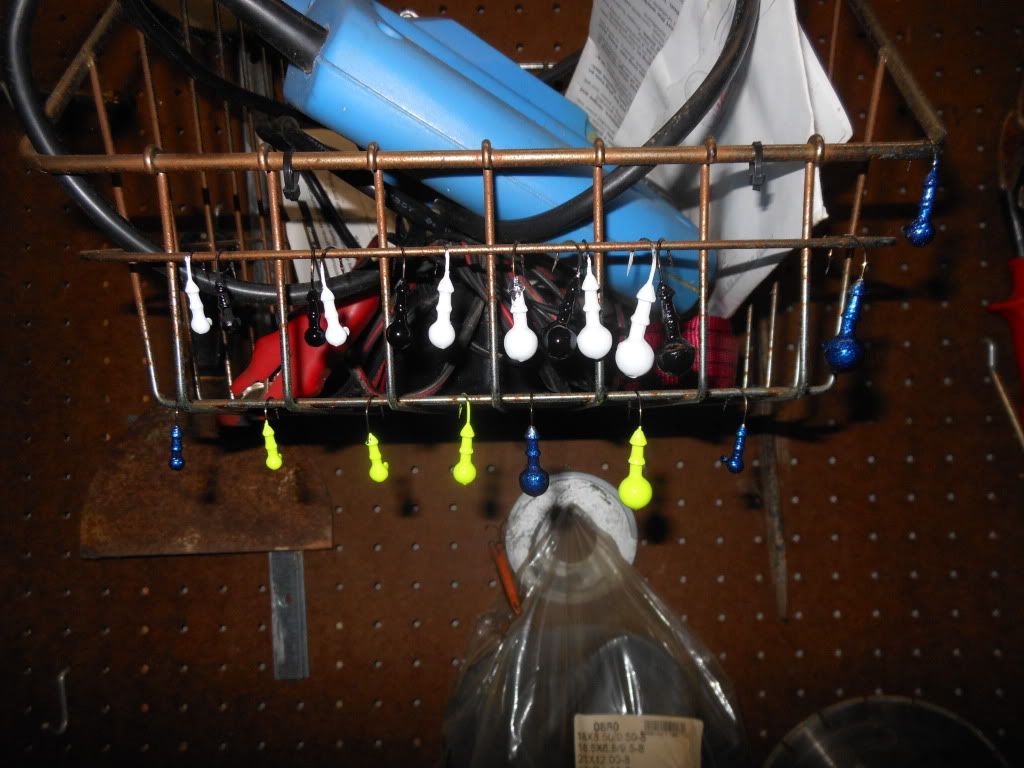
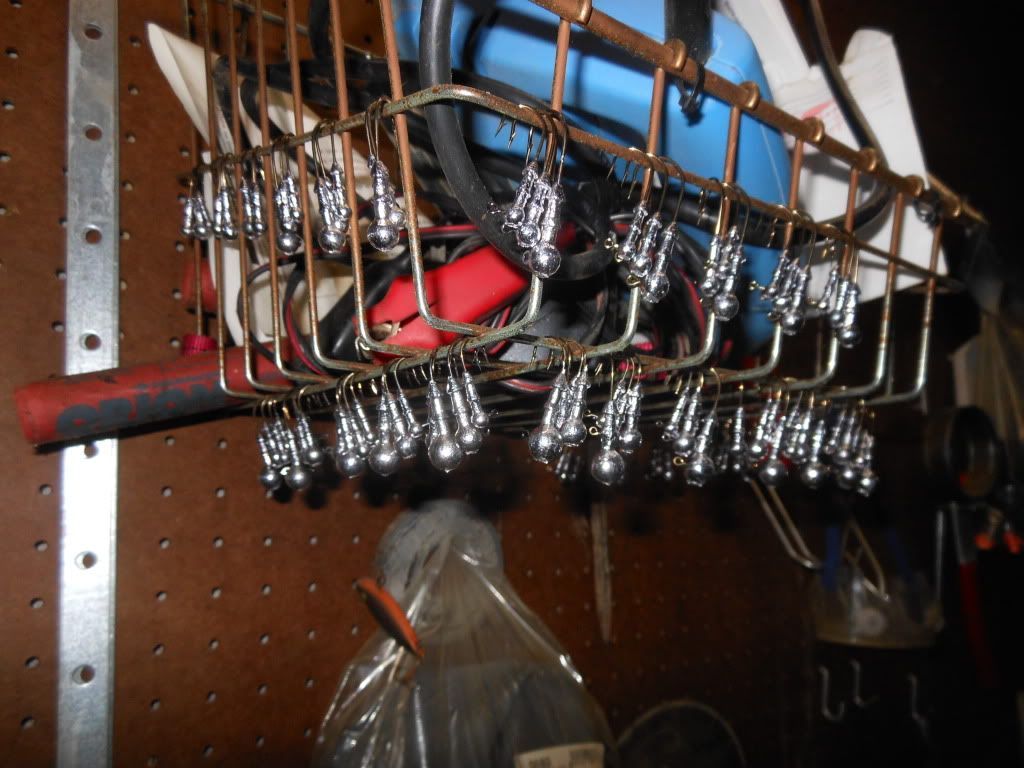
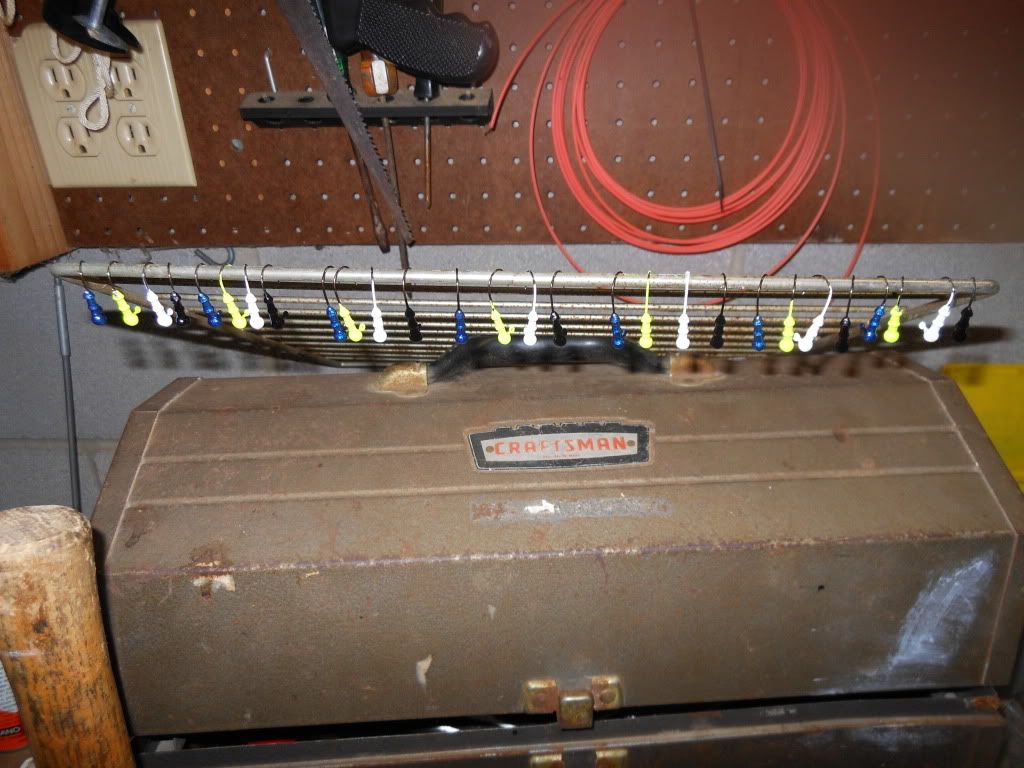
The jigs were cool to touch in seconds. After removing them from the mold I removed the sprue or excess from the top by holding the sprue with pliers and tearing the jig off. The tearing forms a cleaner break than cutting. After removing the sprue you can sand the break off point but I chose not to in my first session as they were already somewhat smooth. After removing all of the sprues I hung the jigs underneath a metal basket attached to a peg board. Having a place to hang your jigs is critical when you get to the painting phase. After each break I dropped the sprue back into the pot, this can get dangerous as drops sometimes shoot out if your not careful.
 |
| Jigs hanging from metal basket attached to peg board |
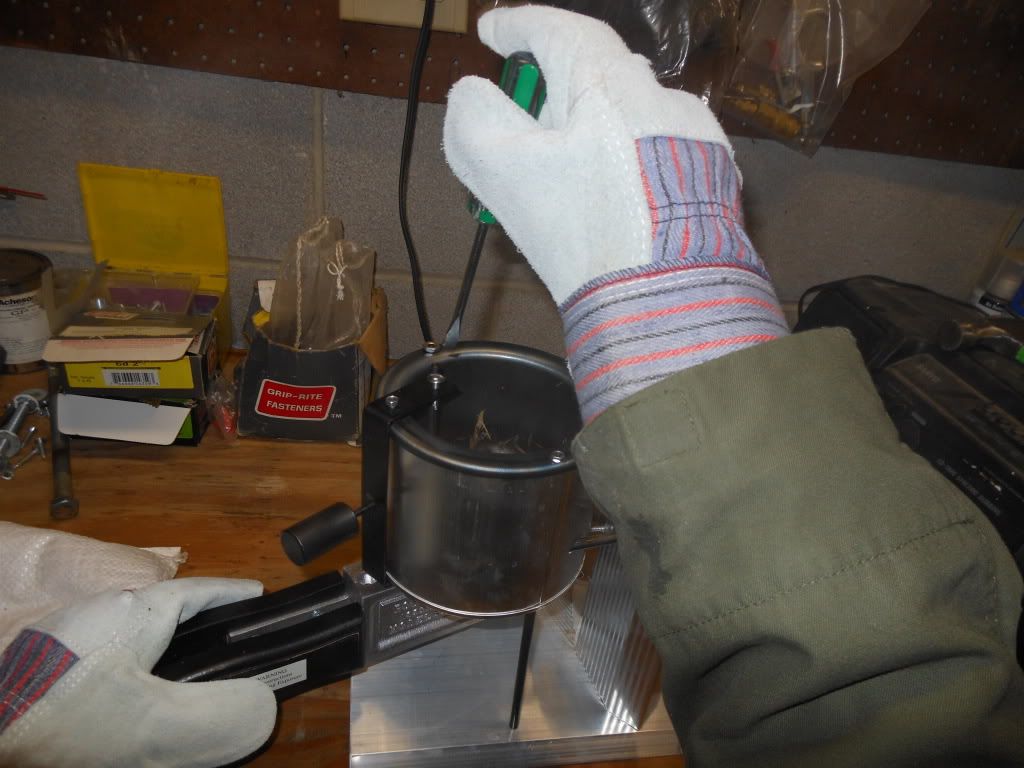
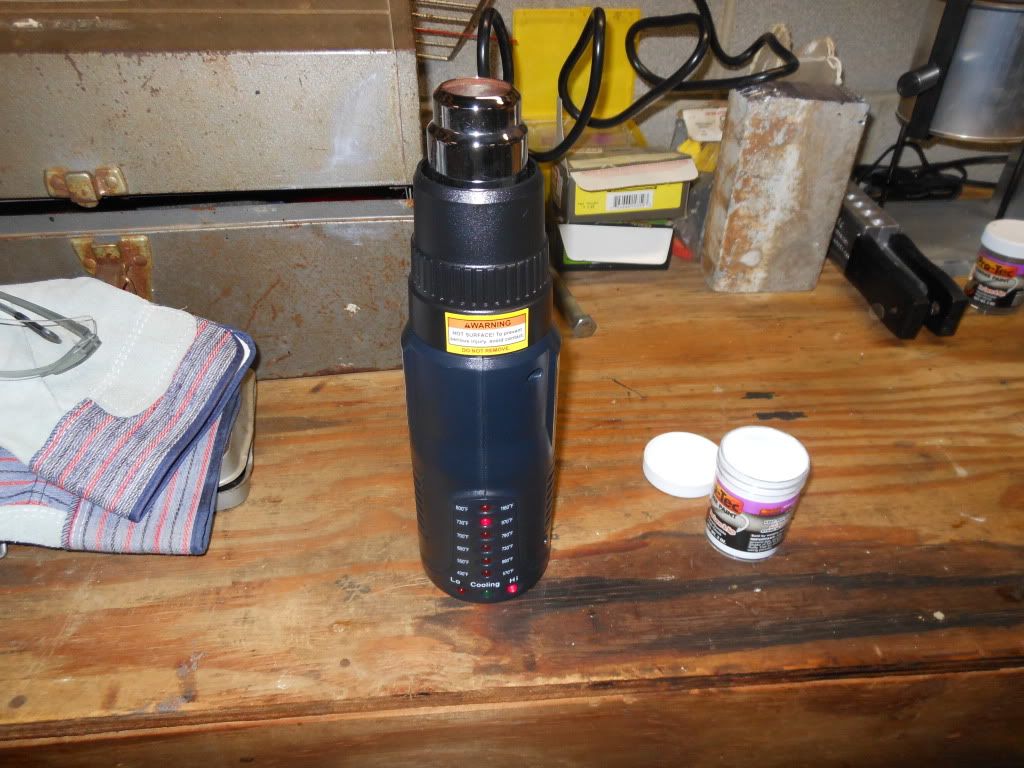
I decided for my first batch I would make 20 jigs, 4 of each of the 5 jigs that I had fitting hooks for. A short while later I had the 20 jigs molded and it was time to try out the powder paint. This is where the heat gun comes in. The process of powder painting is simply heating the jig and giving it a quick dip in the powder and I thought the heat gun would be perfect for this. Some people use blow torches but the heat gun was the best option I had available.
 |
| Heat gun setup |
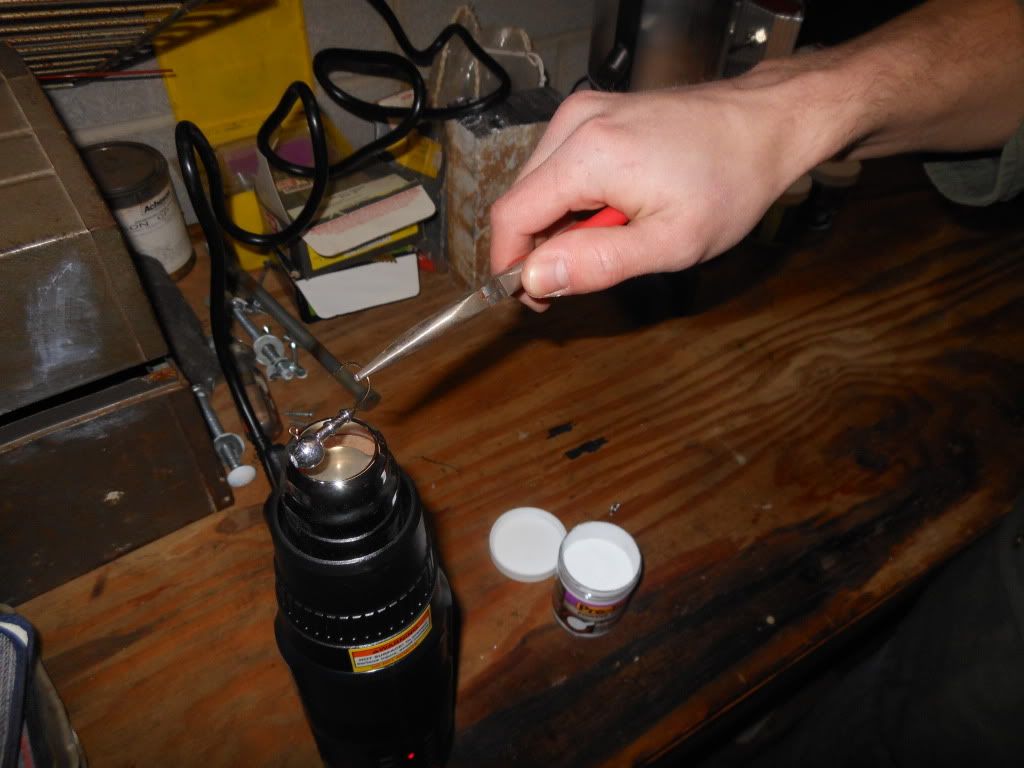
I set the heat gun to 970 degrees, the second to the highest setting on the gun, to ensure the jigs were heated enough in a timely manner. Holding the jig with pliers, I held the jig over the gun for 5-10 seconds.
 |
| Heating a jig |
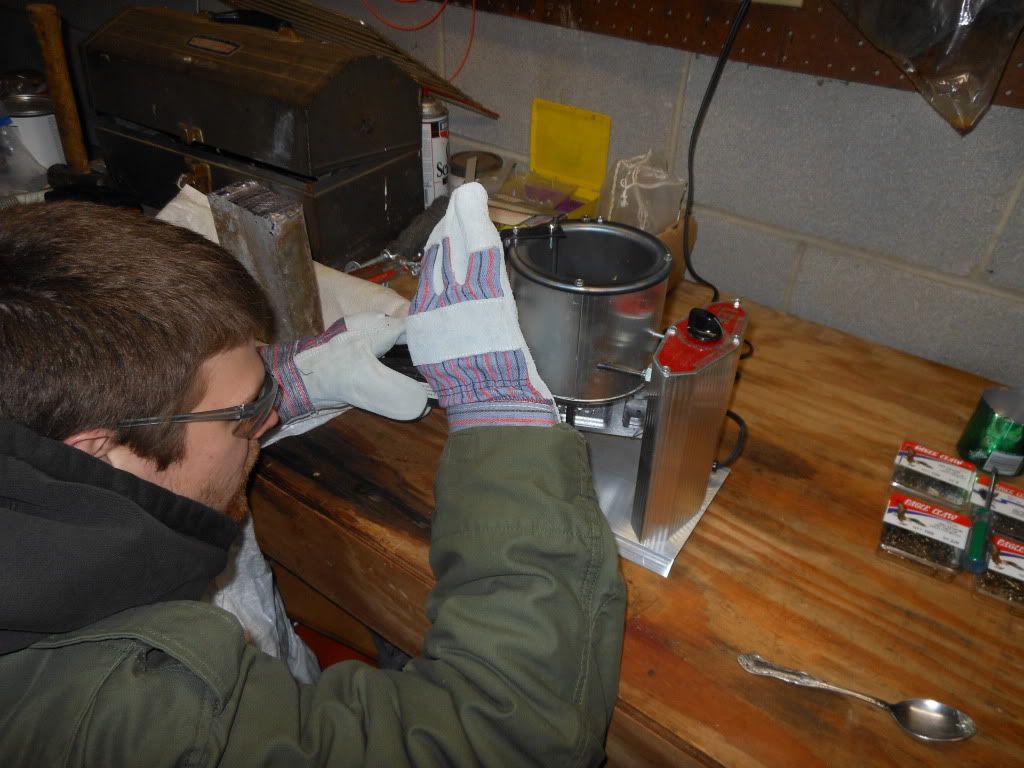
After heating it was just a simple quick in and out dip in the powder and it was done. I found that it is very important to keep the powder stirred, you want the powder to be as fluffy as possible to make the dip easy. Also I found that if you are not heating the jig enough the paint will not dry glossy. If this happens you can reheat it and dip again if necessary. If you don't get a good covering you can also reheat and dip again, just be careful not to reheat too much or the paint will drip. I also got paint on some of the hook shanks but this was okay with me, I'd just avoid getting paint on the hook point so you don't lose the sharpness of the hook.
 |
| Dipping the jig |
After painting it is important not to touch the jig against anything as the paint stays wet for a couple minutes.
 |
| Painted jigs |
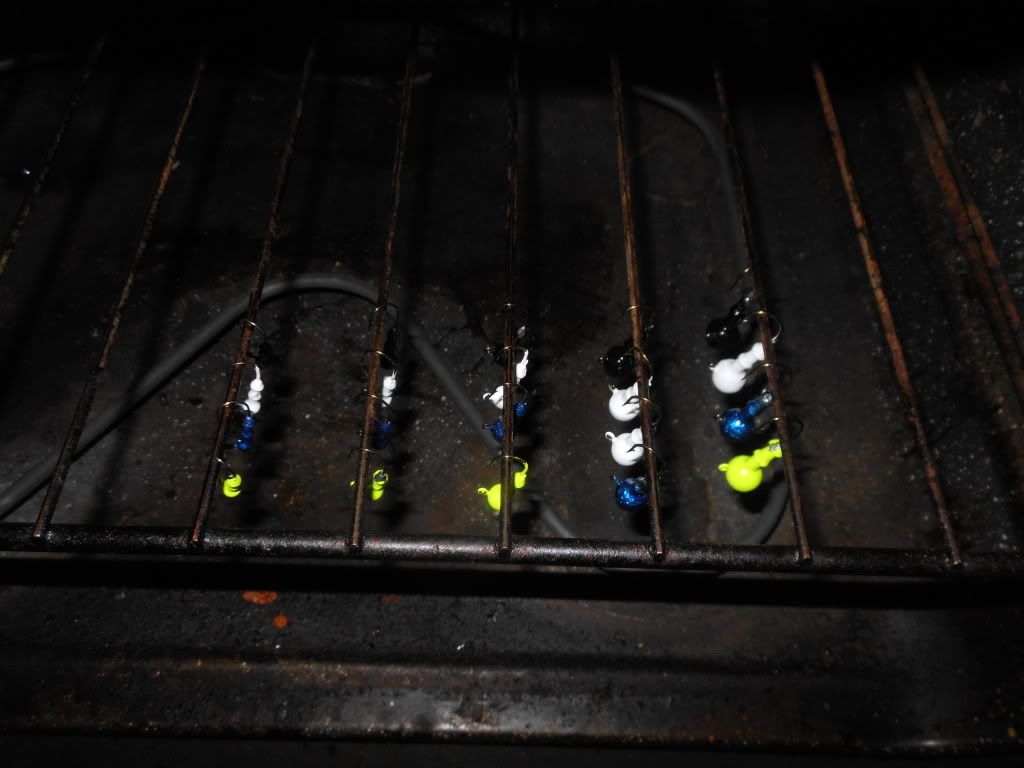
Next it was time to poke the paint out of the hook eyes. This was pretty easy just using another hook, the paint flaked off with ease. After poking the eyes out there was one final step, baking. I'd read that baking your jigs at 350 degrees for 20 minutes would make the paint more durable. So I hung the jigs on the bottom rack in our oven and baked them.
 |
| Jigs hanging in the oven |
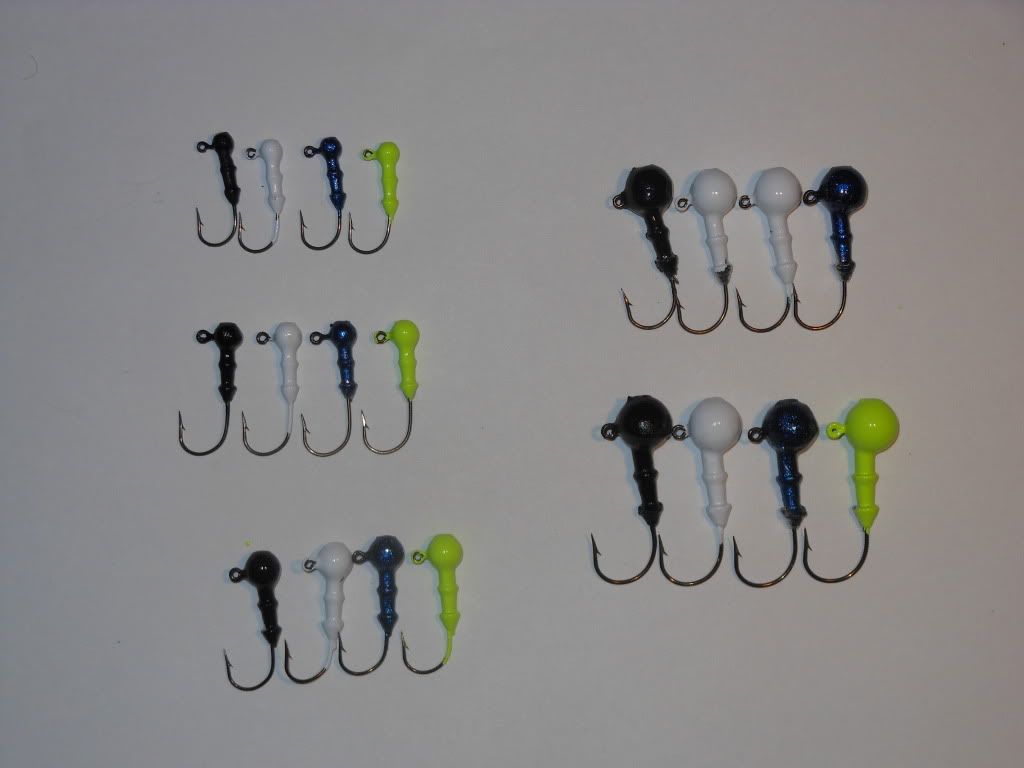
I was pleasantly surprised with the result. After baking the paint was even more glossy and smooth. I found that one of the hook eyes wasn't cleared good enough and paint recovered the eye. Upon trying to clear the eye I found that the paint was hard as rock and no longer flaky. Eventually I was able to clear the eye but was impressed with how strong the paint was, way better than the store bought jigs I've had that often have paint that flakes off easily. Here's a picture of the 20 completed jigs.
 |
| 20 completed jigs |
A few days later I decided I would make a much larger batch so I would have a good stock to try out. Once again I was tasked with cutting another piece of lead from my brick. I still had some lead left in the pot but I wanted to make sure I had enough for the large batch I intended to do. This time I got the idea of pounding an old putty knife through the brick. This way there would be no shavings to worry about and I'd hoped it would be easier and faster. After pounding for 15-20 minutes, I could already tell it was going to be faster, and it was definitely easier. Still not as fast as power tools would be but I was content.
 |
| Pounding a putty knife through the lead brick |
Soon thereafter, I had the piece of lead separated and it was a nice clean cut.
 |
| Second cut of the lead brick |
Before melting the new piece of lead with the previously melted lead I added a couple small pieces of the gulf wax to the mix for flux as the directions stated. I've read that the wax is supposed to help remove impurities but I didn't really notice any differences. This time around I also used a large coffee can to dump the impurities in as the pop can wasn't going to be big enough.
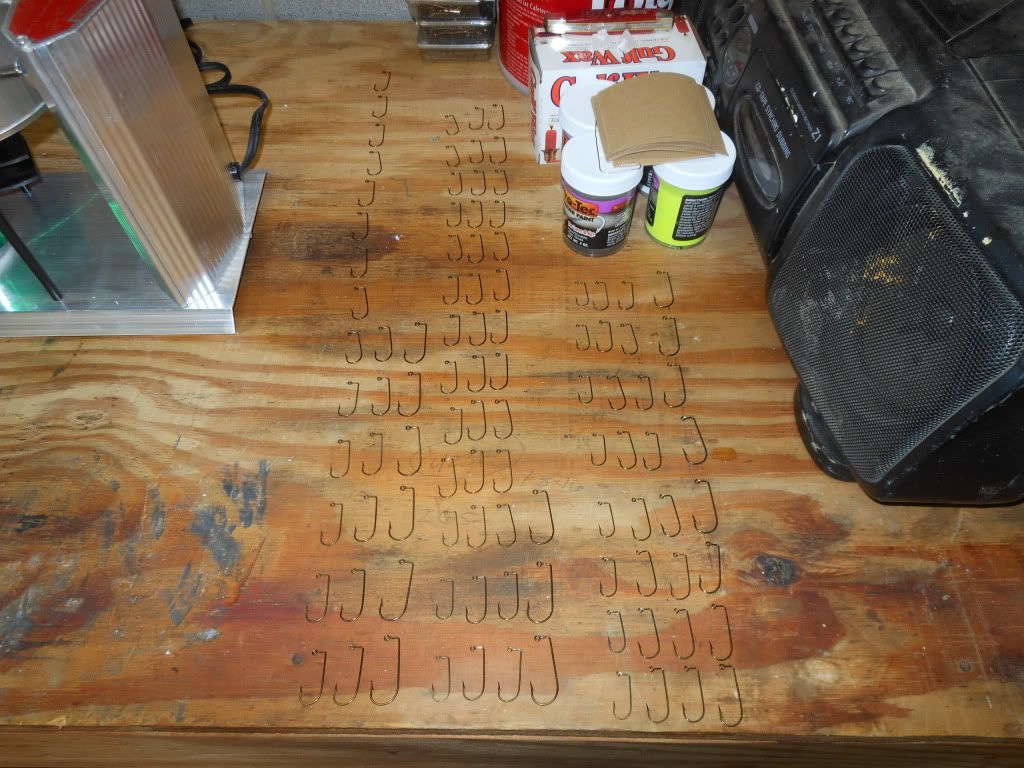
I'd came up with a game plan to make a variety of hook and jig size combination since I could fit different size hooks in each jig mold. Since my plan was fairy elaborate and included 96 jigs total I decided to lay all of the required hooks out in advance so I wouldn't mess up.
 |
| Hooks laid out in advance |
While pouring the jigs this time around I ran into some new issues. Even with the flow control screw adjusted to the point of nearly allowing a continuous drip the flow of the pour became to slow on multiple occasions. When the flow was to slow the lead started hardening in the mold before all of the lead was poured causing the jigs to have imperfections. The solution to this was using pliers to shove a paperclip up into the spout to remove impurities blocking the flow. Also I used the spoon to scoop any impurities away from the valve rod. The other issue was when opening the mold. Several times when opening the mold some of the jigs would have sharp edges and this wasn't because the mold wasn't closed tightly enough. My only explanation is that the still hot jigs were stuck in the mold so tightly that when I opened the mold it was warping them out of shape. The solution I found for this was opening the mold slower making sure all jigs released freely from one side of the mold.
A good while later I was finally finished with the molding phase.
 |
| 96 jigs |
This time around I decided to sand the break off points. It was a time consuming process to do by hand, possibly not worth it as you can barely tell after painting. Here's a picture of a jig after it was sanded.
 |
| Jig after sanding |
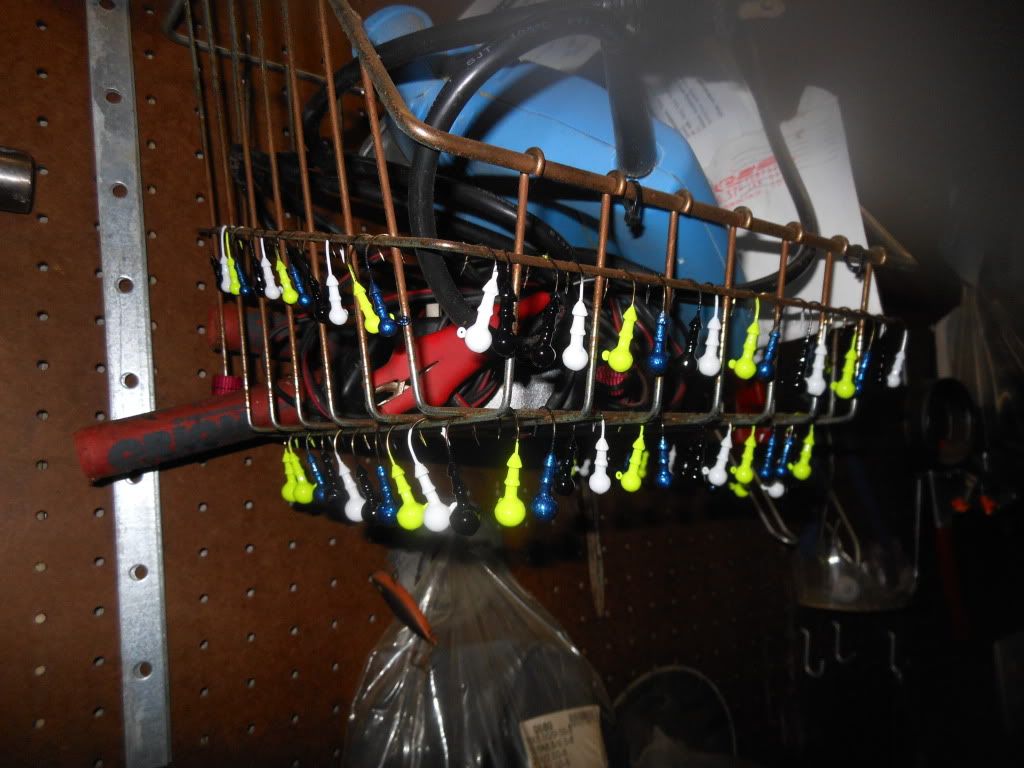
Painting went pretty smoothly. I did need some extra hanging room to avoid jigs with wet paint touching each other.
 |
| 68 painted jigs |
 |
| 28 painted jigs |
Once again I cleared all the hook eyes of paint and baked the jigs. Everything turned out nicely except for one minor defect. For some reason the paint on the bigger chartreuse jigs wanted to drip so some of the chartreuse jigs ended up with some extruding paint on the top of the head.
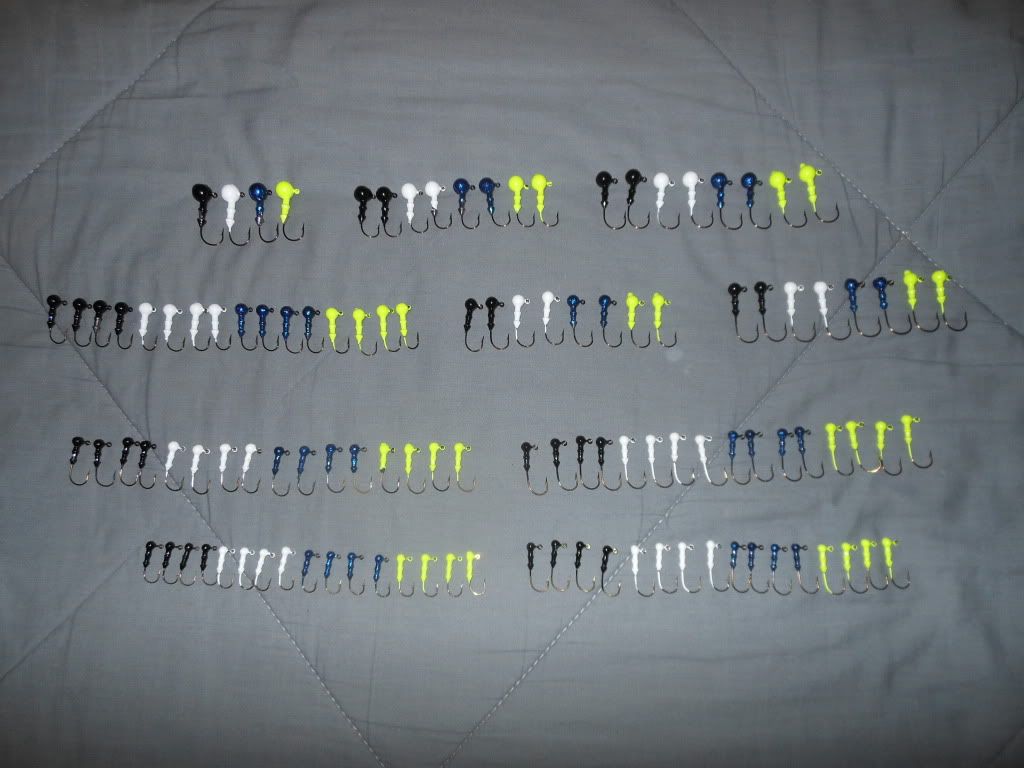
Here's all 116 jigs from both days of production laid out into hook and jig size categories.
 |
| 116 jigs |
Lastly I stored my new homemade jigs neatly in a new Plano box.
 |
| Jigs stored in Plano box |
I can't wait to try them out. I'm very confident that the paint and hooks are far superior to your average store bought jigs.


0 Response to "Making Jigs"
Post a Comment